Arduino MIDI Pedal
Arduino MIDI Pedal
Use an Arduino to send MIDI signals to a keyboard, synthesizer, etc.
- Inspired by the Instructables project by Amanda Ghassaei found here: https://www.instructables.com/Send-and-Receive-MIDI-with-Arduino/
- This project began as a way to address a gap in functionality in my Korg SV-2 keyboard. There is a footswitch pedal which can change the Leslie speaker effect when you are playing organ. However, there is no way to assign other FX to the pedal. For istance, I play EP more than organ so I like using the Tremolo effect. A-la Chick Corea it would be cool to turn the Tremolo on and off at different points as I am playing. I am sure other keyboards out there could have assignable effects pedals, but being an engineer I decided to solve this the hard way.
- First, I found the MIDI parameters that I was interested in which could be edited in the SV-2 manual:
- After some research these were converted into Hexidecimal messages which could be sent to the keyboard using the Arduino script.
noteOn(0xBE, 0x67, 0x7F); /* Toggle Pre-FX On/Off; Initial message (0xBE), some note value (103, which is 0x67), high velocity (0x7F) */ - This was sent to my “noteOn” function which Serial.writes the data to the SV-2 (excerpt below):
// plays a MIDI note
void noteOn(int cmd, int pitch, int velocity) {
  //Serial.write(func);
  Serial.write(cmd);
  Serial.write(pitch);
  Serial.write(velocity);

}

void on() {

  if (programchange == 0) {
    noteOn(0xBE, 0x67, 0x7F); //Toggle Pre-FX On/Off
  } else if (programchange == 1) {
    noteOn(0xBE, 0x68, 0x7F); //Toggle Amp On/Off
  } else if (programchange == 2) {
    noteOn(0xBE, 0x69, 0x7F); //Toggle Modulation On/Off
  } else if (programchange == 3) {
    noteOn(0xBE, 0x70, 0x7F); //Toggle Ambient On/Off
  } else if (programchange == 4) {
    programchange = 0; //cycle back to the beginning
    noteOn(0xBE, 0x67, 0x7F); //Toggle Pre-FX On/Off
  }
}
- Make sure to set the Baud Rate correctly at the beginning of your script
// Set MIDI baud rate: Serial.begin(31250);//MIDI Baud rate 31250, use 9600 for testing - After programming, I bought some components from https://www.digikey.com/ which is a great place for small electronics projects. The full BOM is very small:
- 1 250 Ohm resistor
- 1 MIDI jack
- 1 1/4” TS jack
- 1 Arduino (I used an UNO)
- I partially followed Amanda’s instructables guide for the MIDI jack and wired up the circuit for my pedal:
- Not shown: The simple other part of the circuit connects to a 2-pin TS jack. One pin goes to an input on the Arduino and one pin goes to ground. Be sure to include a pull-down resistor to avoid noise (or just use Pin 13 on the Arduino which has a built in pull-down circuit).
- The TS jack is where the footswitch pedal connects to the Arduino. It sends the on/off signal to the program.
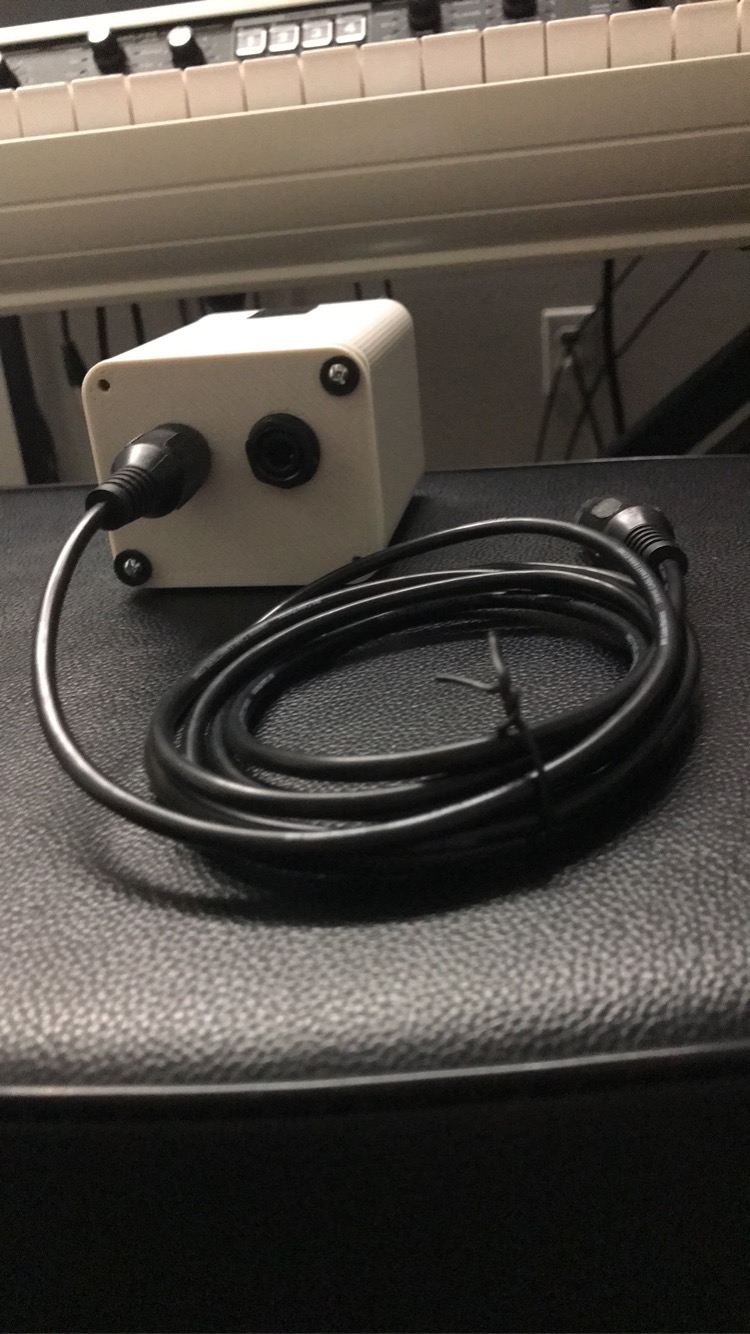
- Lastly, I designed a simple case and 3D printed it to house the hardware components.
The Finished Product!
Let me know if you have any improvement ideas!
- This Arduino code is pretty hacky and basic, but it gets the job done. If there are other functions that you think would be cool to add or would work with a single On/Off footswitch, give it a try and let me know how it turns out!
What comes next?
- When changing FX, it takes 2 presses to turn on the new effect instead of 1
- What to do with hold function?
- Adjust double press time to be a bit more forgiving
- Abmient on/off FX is not working, could be the MIDI code/something internal to the SV-2
- Pitch bend?
- DCgaptime affects the latency of the FX turning on or off. Obviously low latency is better for musicality
Check out the full project here.


